
CyberPanel provides an easy way to issue Let’s Encrypt SSL Certificates for your websites. In this tutorial, we will learn two ways to issue an SSL certificate for websites in CyberPanel.
Table of Contents
1. Issuing SSL Certificate using CyberPanel SSL Section
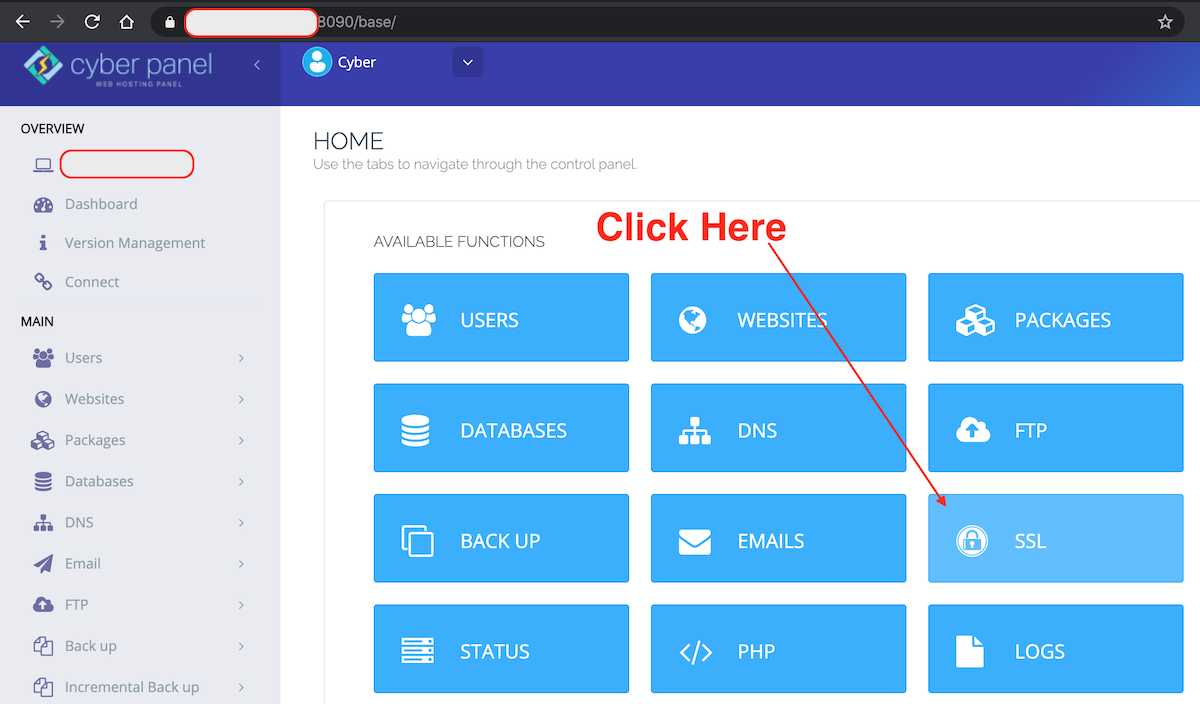
When you log in to CyberPanel Dashboard, the home page has a lot of segments for different types of functionalities. Click on the “SSL” button.
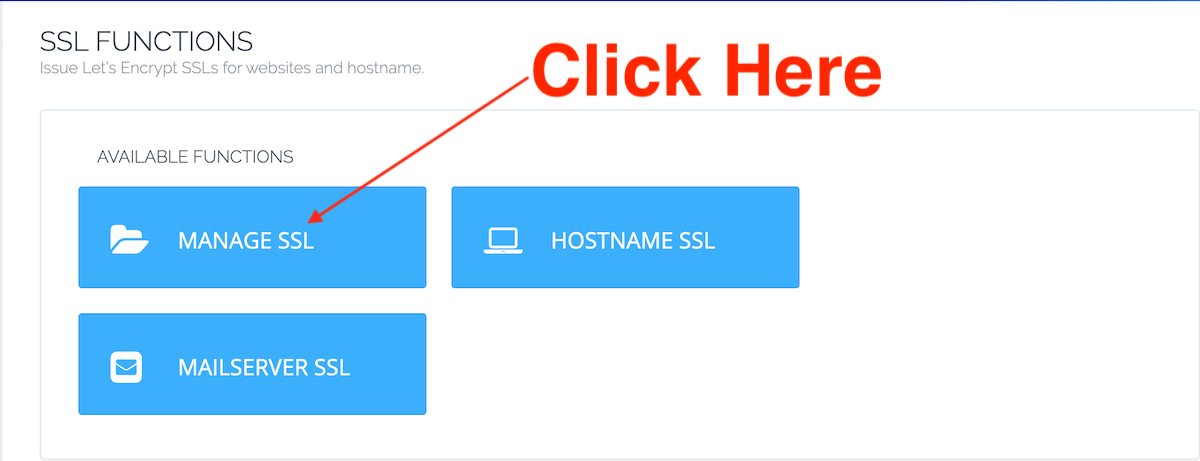
It will open the “SSL Functions” page, click on the “Manage SSL” button.
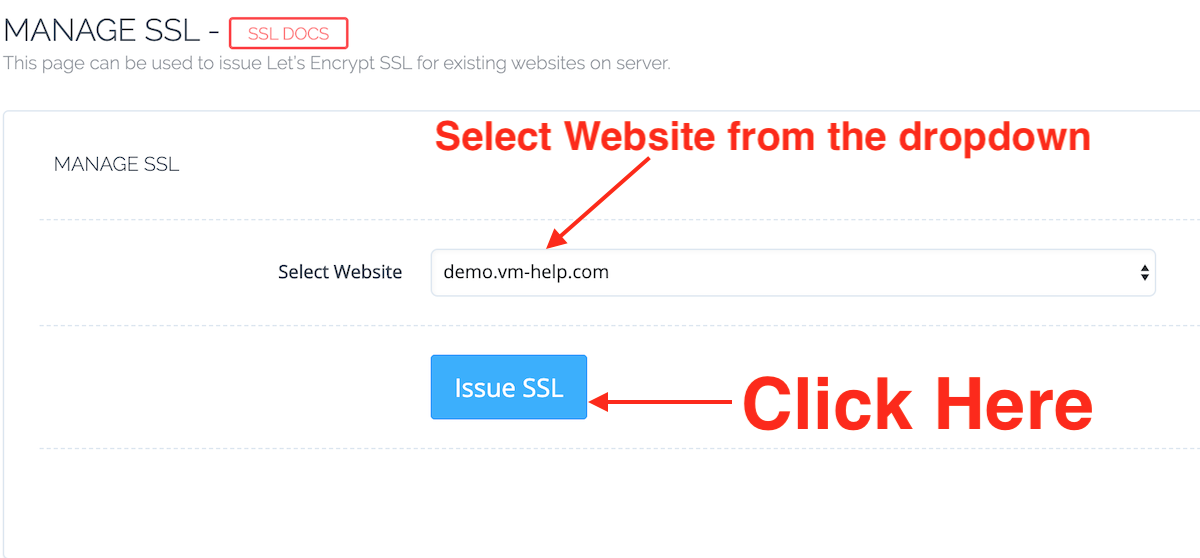
on the next page, select the website and click on the “Issue SSL” button.
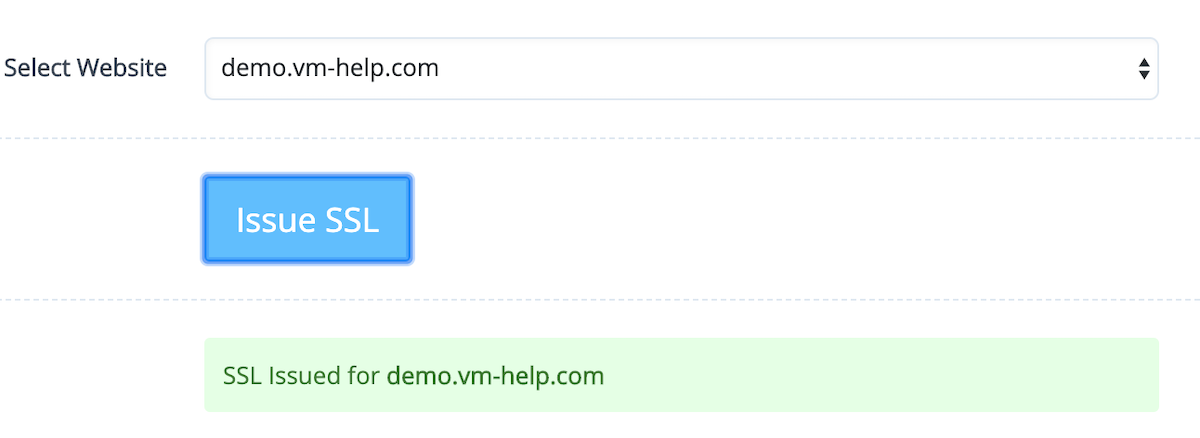
You should see the “SSL Issued” message for the website as shown in the below image.
2. Issue SSL Certificate from List Websites
You can also issue an SSL certificate for a website by going through the sidebar menu “Websites -> List Websites“. Once you are on the websites list page, you can click on the “Issue SSL” link to issue the Let’s Encrypt SSL Certificate for the website.
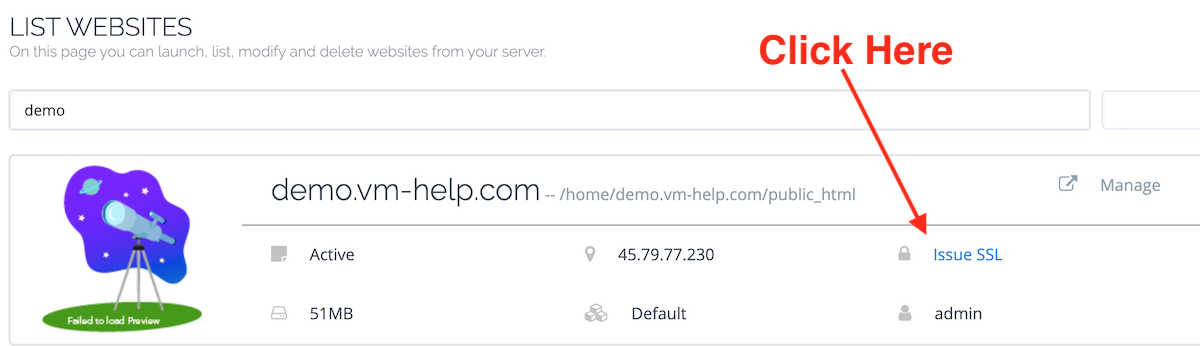
Pro Tip: If you have a lot of websites, you can use the search function to locate the website easily.
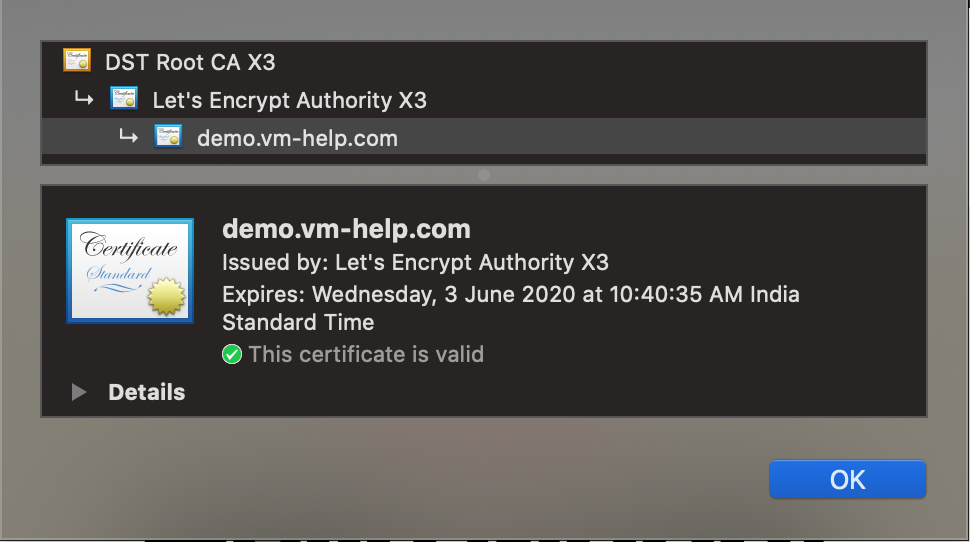
3. Verifying Website SSL Certificate
After issuing the SSL certificate, it’s important that you verify it yourself. The easiest way is to launch the website in the browser and click on the “Lock” button at the address bar and check the certificate validity.
Conclusion
It’s not very hard to issue SSL certificates from the command line too. But, CyberPanel has options to easily issue SSL certificates from Let’s Encrypt, which is absolutely free and used by over 300 million websites.